
Last Updated: October 31, 2026
Quick Summary
Putting green drainage extends a green’s life by moving water away before it can soften the base, rot the backing, or drown turf roots. Good drainage keeps the substrate firm, protects seams, and lets the surface dry between storms, which is why it sets how long the green lasts.
- Waterlogging softens the base, weakens seams, and encourages mold that breaks down infill and backing.
- Use surface grading to shed water and subsurface lines to remove what soaks through.
- Clay soils drain slowly and usually need subsurface pipes.
- Run a drain test by pouring one gallon of water and timing how long it takes to disappear.
- Clear surface debris and outlets monthly, and inspect seams and drain lines twice a year.
Table of Contents
- Why Drainage Decides How Long a Putting Green Lasts
- How Waterlogging Damages Turf and Roots
- How a Putting Green Drainage System Works
- Base Preparation That Makes Drainage Work
- Measuring Drainage Performance and Spotting Problems
- A Maintenance Schedule That Protects Drainage
- Planning Your Next Drainage Step for a Green That Lasts
- Frequently Asked Questions
Good putting green drainage decides how long a putting green lasts. Most homeowners who lose a green to rot, bare patches, or spongy turf blame the grass or the weather, but the real culprit is usually water that never left the surface. Heavy summer storms and clay-heavy soil across the American South make drainage the first thing to get right.
Quick Summary: Good drainage keeps roots oxygenated, prevents standing water and disease, and protects the base under your green. The sections below walk through seven ways drainage extends putting green life.
Why Drainage Decides How Long a Putting Green Lasts
A putting green is only as durable as the ground beneath it. Water that sits on the surface or soaks into a poorly prepared base softens the substrate, weakens seams, and encourages mold and mildew. Over time, that moisture breaks down the infill and loosens the green’s backing.
Good drainage moves water away before it can cause damage. It keeps the base firm, protects the fibers, and gives the surface a chance to dry between rainstorms. Think of drainage as the foundation of longevity, not an optional extra.
How Waterlogging Damages Turf and Roots
Waterlogging happens when soil or infill stays saturated longer than it should. In natural turf, this drowns roots and starves them of oxygen. In synthetic installations, standing water can still cause problems through the base, the infill, and the edges.
Common signs of waterlogging include:
- Standing water that lingers hours after rain
- Soft or spongy spots underfoot
- A musty smell from the base
- Discoloration, algae, or mold on the surface
- Shifting seams or edges that lift
Over a full season, these problems compound. The surface gets less firm, play becomes uneven, and the green looks worn long before its warranty period ends.
How a Putting Green Drainage System Works
A drainage system gives water a planned route out of the green. Water enters through the surface, moves through the infill and base, and exits through drain lines or outlets.
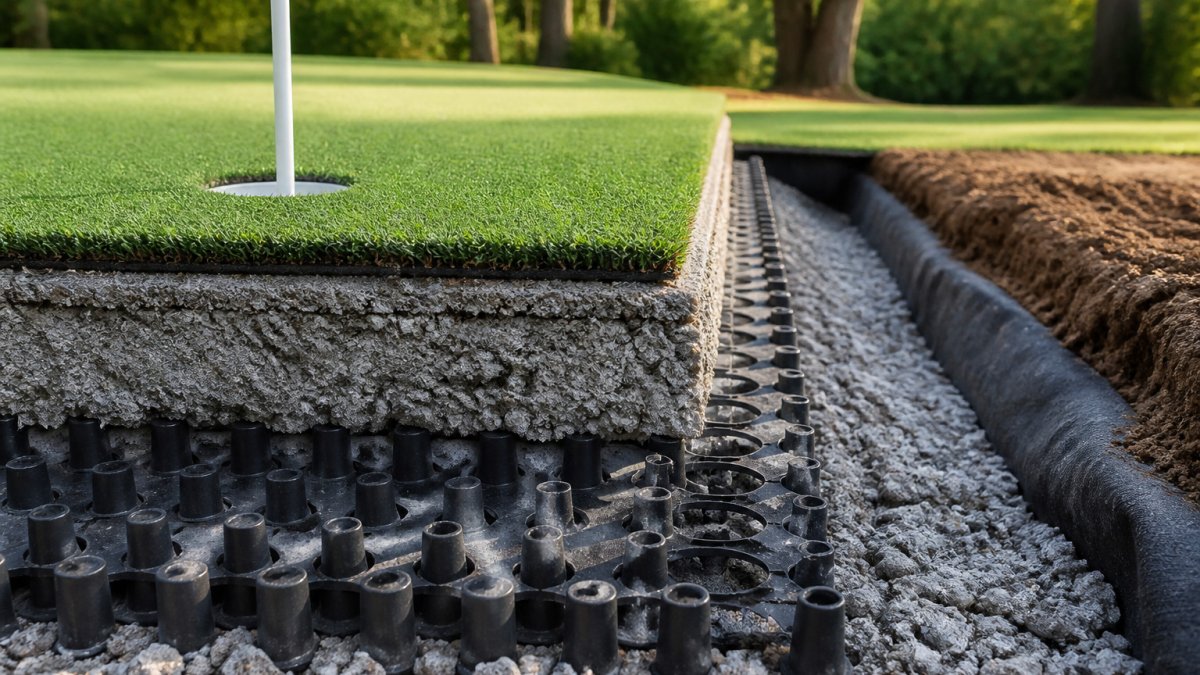
The layers matter. A well-built green typically includes a compacted base, a drainage layer such as crushed stone, a backing that allows water through, and infill that holds its shape. Each layer must pass water at the right speed or the whole system slows down.
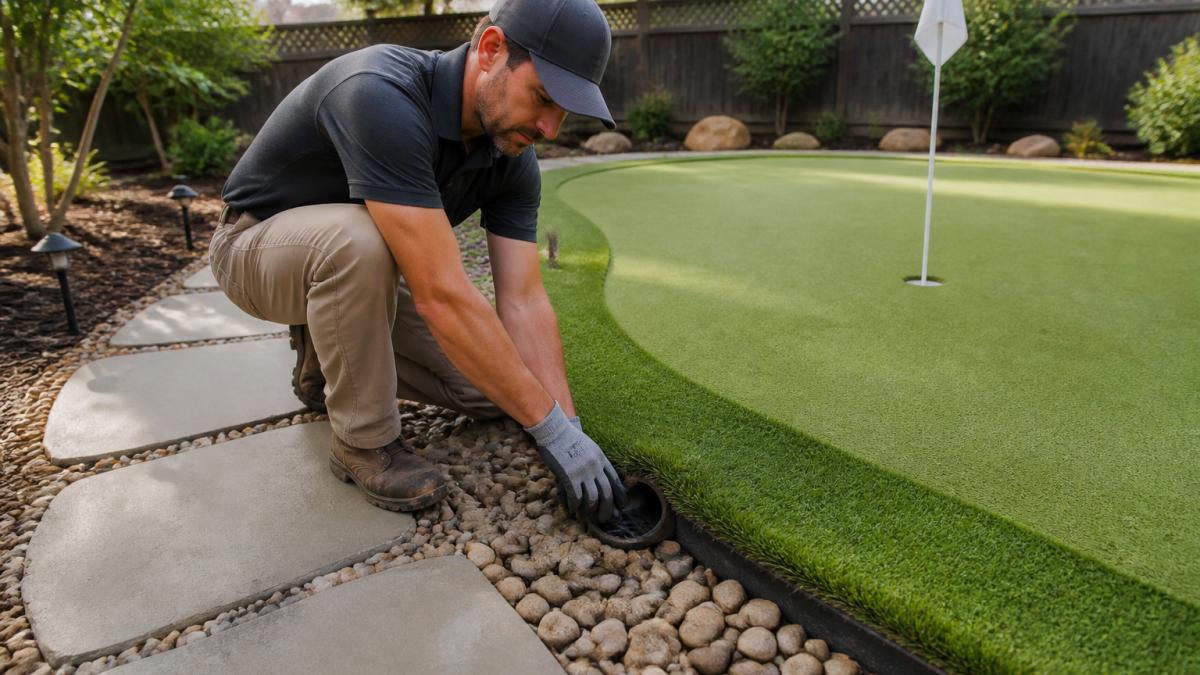
A groundskeeper inspecting a drain outlet at the edge of a backyard putting green on a sunny morning would look for debris, clear flow, and proper slope toward the outlet.
Surface Drainage vs. Subsurface Drainage
Surface drainage moves water across the top of the green and off to the edges. It relies on proper grading, so the surface slopes gently toward collection points. It works well for light to moderate rain but struggles with heavy storms.
Subsurface drainage moves water below the surface through buried pipes, gravel trenches, or permeable layers. It handles larger volumes and keeps the base dry. Most long-lasting greens use both: surface grading to shed water and subsurface lines to remove what soaks through.
Choosing Between Drainage System Types
The right system depends on your site, soil, and how much rain you get. Clay soils drain slowly and usually need subsurface pipes. Sandy soils drain quickly but may need better base compaction to hold shape. Sloped yards can often rely on surface runoff, while flat yards need active removal.
Ask these questions before choosing:
- How heavy is the typical rainfall in your area?
- What is the native soil type?
- Is the site flat, sloped, or uneven?
- How easily can you reach outlets for maintenance?
Base Preparation That Makes Drainage Work
Drainage only works if the base beneath it is built right. Start by removing organic material and grading the site to a consistent slope, usually enough to move water without creating a noticeable tilt. Compact the subgrade in stages to prevent settling.
Next, add a drainage layer of clean, angular crushed stone. Avoid round gravel, which can shift under load. Keep the layer thick enough to carry water to your drain lines without holding it.
Watch out: skipping compaction or using contaminated fill can cause the base to sink, which traps water in low spots and undoes the entire drainage plan.
Measuring Drainage Performance and Spotting Problems
You can check drainage with a simple test. Pour a measured amount of water, such as one gallon, onto a small area and time how long it takes to disappear. Repeat in several spots, including the low corners and near the edges. Slow drainage in any one zone points to a problem.
Look for these warning signs:
- Water that takes more than a few minutes to clear
- Consistently wet patches after rain
- Outlets that run dry or clog quickly
- Uneven settling or dips in the surface
Catching these issues early saves you from costly repairs later.
A Maintenance Schedule That Protects Drainage
A drainage system that is never inspected is a system you are trusting blindly. Most failures on putting greens are not design failures, they are maintenance failures that show up as a wet spot months after the cause began. The schedule below is built around the seasons and around the symptoms you are most likely to see.
Seasonal Inspection Calendar
- Early spring (before the wet season): Walk the green after the first soaking rain and note every spot that stays soft more than a few hours. Clear leaves, sand, and debris from surface collection points and outlet grates. Confirm outlets are flowing, not just present.
- Late spring: Flush drain lines if you have cleanouts. Check that the surface still slopes toward collection points and that no low spots have developed over winter.
- Summer: After heavy storms, inspect for new pooling and for seams or edges that have lifted. Heat and heavy rain together are when base problems surface.
- Early fall: Clear fallen leaves before they mat over outlets. Re-test drainage speed in the zones you flagged in spring to see whether they improved or worsened.
- Late fall / early winter: Do a full inspection of seams, edges, and visible drain lines before freeze risk. Confirm outlets are clear so winter meltwater has a path out.
Monthly and Quarterly Tasks
- Monthly: Remove debris from the surface and outlets. Rinse the green to flush fine particles toward the drainage layer rather than letting them pack in place.
- Quarterly: Run a simple drain test, pour a measured amount of water (a gallon is a practical unit) onto several spots, including low corners and edges, and time how long it takes to disappear. Record the times so you can compare across the season.
- Twice a year: Inspect seams, edges, and any accessible drain lines. Look for settling, separation, and crushed or disconnected pipe.
Troubleshooting: Match the Symptom to the Cause
A wet spot is a symptom, not a diagnosis. Use this logic before you spend money on a fix:
- Water lingers in one zone after every rain, but outlets flow freely: suspect a settled low spot or a clogged section of trench, not a blocked outlet. Check the surface grade first.
- Outlets run dry even after heavy rain: suspect a blockage upstream, roots, sediment, or a collapsed section of pipe. Trace from the outlet back toward the green.
- Water clears slowly everywhere, not just one spot: suspect the drainage layer itself, fines have migrated into the gravel, or the infill has compacted and slowed infiltration. This is a bigger repair than a spot fix.
- Musty smell or algae near edges: suspect trapped moisture at the perimeter where the base meets the edge restraint. Check that water can escape at the edges, not just through the field.
- New soft spot after a dry spell followed by heavy rain: suspect a void under the surface where the base has settled. Probe gently and compare to surrounding firmness.
Do not add infill or topdress over a wet spot until you have identified the cause. Covering a drainage problem traps moisture and accelerates the damage you are trying to prevent.
When to Call for Help
Some problems are routine maintenance; others signal a design or installation issue. Call a professional if outlets cannot be cleared with normal flushing, if a wet zone returns after every repair, if the surface has settled more than a minor dip, or if you cannot locate your drain lines. A drainage plan or as-built sketch of your system saves hours of guesswork and is worth requesting at installation.
Drainage longevity comes from routine inspection and early troubleshooting, not from a one-time installation. A green that is walked after every major storm and tested quarterly will outlast one that is only examined when it fails.
The schedule below sums up when to inspect and what each check is for.
| Timing | Task | Purpose |
|---|---|---|
| Early spring | Walk green after first soaking rain | Find spots that stay soft |
| Late spring | Flush drain lines | Keep lines clear |
| Summer | Inspect after heavy storms | Catch new pooling |
| Early fall | Clear leaves from outlets | Prevent matting over outlets |
| Late fall | Inspect seams and outlets | Ready for winter meltwater |
| Monthly | Remove debris and rinse | Flush fines toward drainage layer |
| Quarterly | Run drain test with one gallon | Compare drainage speed over time |
| Twice a year | Inspect seams and drain lines | Check settling and crushed pipe |
Planning Your Next Drainage Step for a Green That Lasts
Start by testing your current drainage and noting any problem zones. If your green already has waterlogged areas, address the base and outlets first, since surface fixes will not hold without them. If you are planning a new installation, design drainage into the project from the beginning, because retrofitting is harder and more expensive.
Pricing for drainage work depends on the size of the green, the soil conditions, the system type, and how much excavation is needed. For current pricing or a quote tailored to your site, visit the Southern Artificial Turf website and request a quote.
Frequently Asked Questions
How does drainage affect putting green longevity?
Drainage controls how long water stays in the root zone. When excess water drains away, soil keeps the oxygen roots need and turf stays resilient. When water pools, roots weaken, the soil compacts and disease risk rises, which shortens the working life of the green. Good drainage does not replace good maintenance, but it removes one of the most common causes of early decline. Inspecting outlets and surface grading each season helps catch problems before they damage the surface.
What drainage is needed under a synthetic putting green?
A synthetic putting green needs a base that moves water away from the surface quickly. Most installations use a compacted, free-draining aggregate base with a slight slope and perforated drain lines that lead to an outlet. The base should be graded so water never collects in low spots. Installers typically check infiltration rates before finishing the surface, and the drain outlets must be clear of debris so water can exit the system.
How can you tell if a putting green has a drainage problem?
Common signs include standing water that lingers hours after rain, soft or spongy areas, muddy spots, mold or mildew growth, and uneven ball roll caused by water pooling. A simple test is to pour a few gallons of water on a suspect area and time how long it takes to disappear. Slow drainage points to compacted soil, clogged drain lines or a grading problem. Checking the outlets and surface slope usually identifies the cause.
How often should putting green drainage be inspected?
Inspect drainage at least twice a year, ideally before the rainy season and after the heaviest use period. After major storms, check for standing water and clear any debris from drain outlets. Look for settling, low spots and clogged lines during each inspection. Regular checks are inexpensive compared with the cost of regrading, replacing damaged turf or rebuilding a base that has failed.
Protect your putting green from the start. Get a Quote from Southern Artificial Turf for a drainage plan built for your yard and climate.