
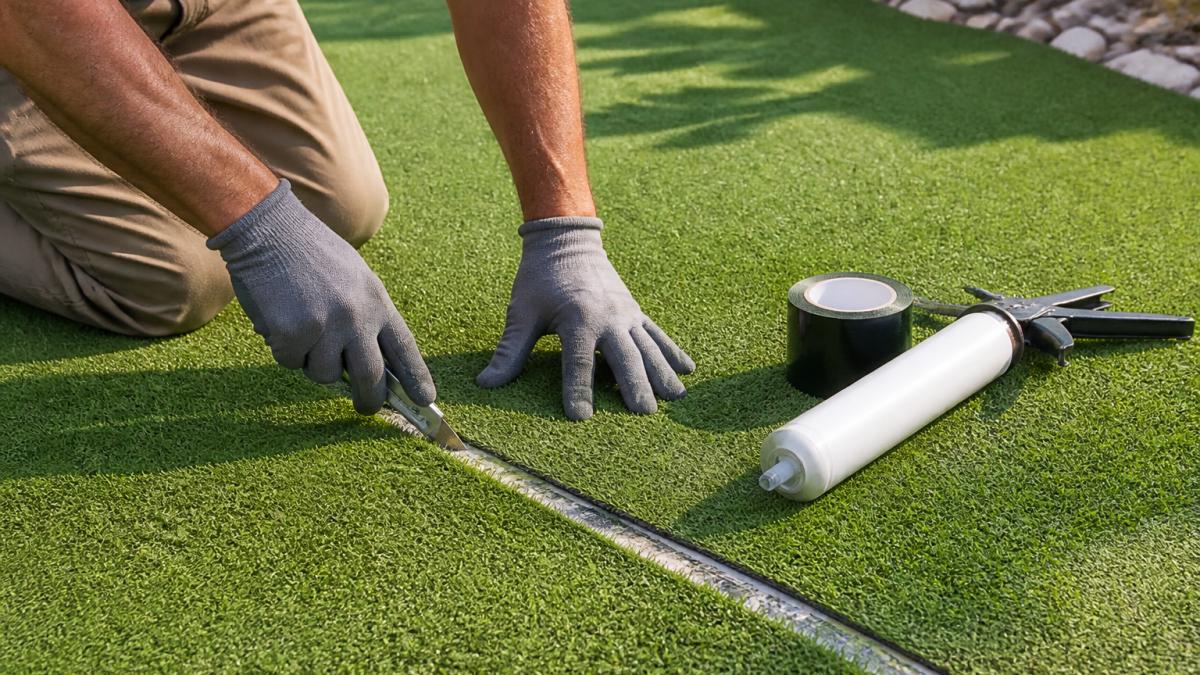
Last Updated: October 23, 2026
Quick Summary
How to repair seams in artificial putting greens involves lifting the turf edges, removing old adhesive and tape, cleaning the backing thoroughly, applying new seam tape with a zig-zag adhesive bead, and rolling the seam firmly three times. Allow adhesive to cure for 24 hours minimum before use, then brush fibers and redistribute infill to hide the seam and create a smooth, invisible finish.
- Seam repairs take 4-6 hours plus 24 hours minimum adhesive cure time before the green is playable.
- Remove all old adhesive completely by scraping; leftover residue prevents new adhesive from bonding properly.
- Apply adhesive in a pencil-width zig-zag pattern and roll the seam at least three times with firm, even pressure.
- Test ball roll from multiple angles and directions; a properly repaired seam should not affect the ball’s movement or speed.
- Call a professional if the base layer is soft, multiple seams have failed, or your DIY repair fails again within weeks.
Table of Contents
- Why Putting Green Seams Fail and How to Diagnose the Problem
- Tools and Materials You’ll Need for Seam Repair
- Repairing Lifting Artificial Turf Seams: Step-by-Step
- Selecting and Applying Artificial Turf Seam Tape and Adhesive
- How to Hide Seams in Artificial Grass for an Invisible Finish
- Artificial Putting Green Repair: Quality Checks and Ball-Roll Testing
- Common Mistakes to Avoid During Seam Repair
- When to Call a Professional for Putting Green Seam Repair
- Frequently Asked Questions
Why Putting Green Seams Fail and How to Diagnose the Problem
Understanding how to repair seams in artificial putting greens starts with knowing why they fail: adhesive breaks down, turf backing cracks, or the base layer shifts. Diagnose the cause before repairing to prevent recurrence.
Common causes of seam rupture and lifting
Base layer problems are another major failure mode. If the sub-base settles unevenly or drainage pools beneath the seam, the turf backing flexes and cracks, breaking the adhesive bond from underneath.
Turf movement causes visible rupture too.
Installation mistakes matter too. Seams applied in cold weather, high humidity, or direct sunlight often fail because the adhesive didn’t cure correctly.
Inspecting seam damage before you start
Walk your putting green and look for these specific signs of seam trouble:
- Visible gaps between turf edges where you can see the backing
- Raised edges or ridges where the seam has lifted above the surface
- Soft spots along the seam line when you press down firmly
- Discoloration or dark staining that indicates moisture under the seam
Press firmly along the entire seam. If the turf moves independently on either side, the adhesive has failed; a strong seam feels like one solid piece.
Lift the turf edge gently and check the backing for old adhesive residue, moisture, mold, or a soft, degraded layer.
Test the base beneath the seam. A properly compacted base feels firm and doesn’t shift when pressed; soft spots indicate drainage problems or poor compaction.
Tools and Materials You’ll Need for Seam Repair
Gather everything before you start; missing tools force you to stop mid-repair.
Essential tools:
- Utility knife with fresh blades
- Seam roller (a hand tool that applies pressure evenly)
- Putty knife or scraper for removing old adhesive
- Tape measure
Materials for reseaming:
- Artificial turf seam tape (matching your turf width)
- Turf adhesive rated for artificial grass
- Clean cloth for wiping residue
- Infill material to match your existing putting green
EPA guidance on synthetic turf installation standards confirms that proper materials and installation methods extend the life of artificial putting greens significantly.
You can repair small tears in artificial grass using similar techniques, but seam repair requires more precision because the entire ball-roll surface depends on a smooth, invisible seam.
Repairing Lifting Artificial Turf Seams: Step-by-Step
Learning how to repair seams in artificial putting greens takes 4-6 hours depending on seam length, plus adhesive cure time, typically 24 hours minimum before use.
Step 1: Lift the turf edges carefully
Start at one end and gently lift the turf edge on both sides of the seam. Work slowly; forcing it risks tearing the backing or fibers.
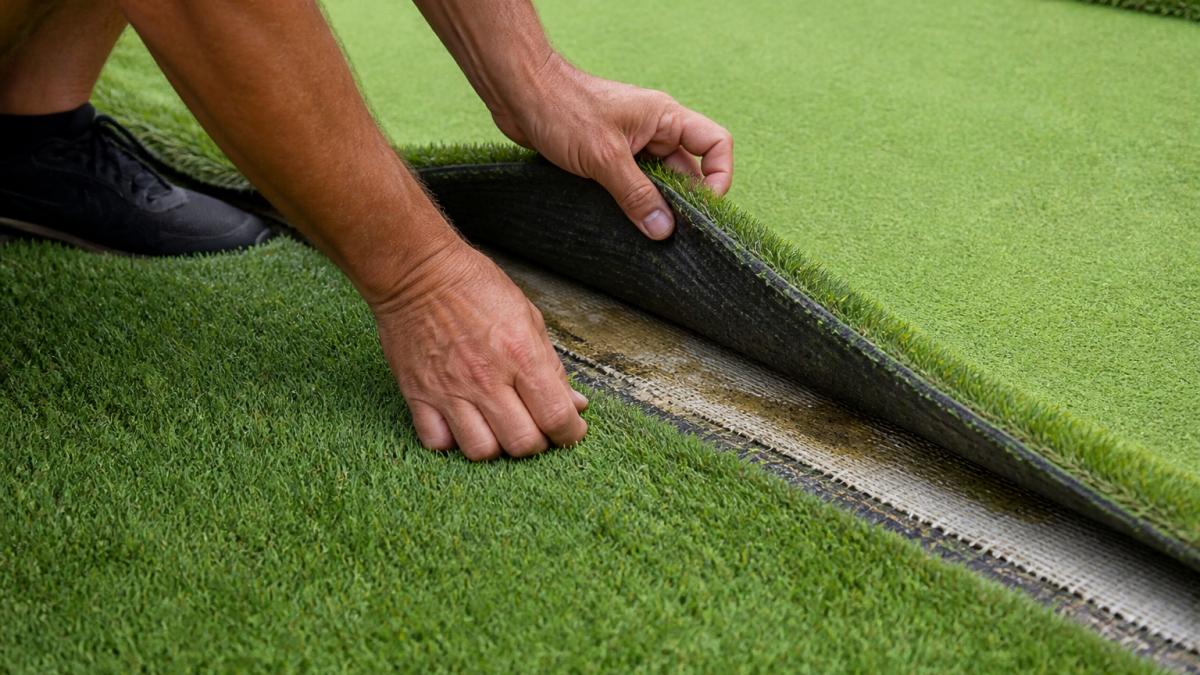
Lift the turf back about 12-18 inches along the seam, enough room to remove old tape and clean the backing.
Step 2: Remove old seam tape and adhesive residue
Once lifted, scrape away all the old seam tape and dried adhesive with a putty knife.
Scrape firmly without gouging the backing; leftover adhesive prevents the new tape from bonding. Keep scraping until the backing feels clean and smooth.
Wipe the backing with a clean, dry cloth; leftover dirt weakens the new bond. A heat gun softens stubborn adhesive.
Step 3: Clean and prepare the turf backing
Inspect the backing as you clean. Mold, moisture, or soft spots mean the base layer has failed, repair that section before reseaming, or new adhesive just delays the problem.
Wipe both lifted edges with a dry cloth. The backing must be completely dry; if moisture is present, allow at least 2 hours of drying.
Check that the edges align; if offset, gently pull the turf to match fiber direction. Proper alignment prevents visible seams after repair.
Selecting and Applying Artificial Turf Seam Tape and Adhesive
The wrong adhesive or incompatible tape causes seams to fail within months. Match materials to your turf type and climate.
Adhesive selection and compatibility
Check your manufacturer’s specifications; some brands require specific adhesive types, and the wrong one voids warranties.
For putting greens in the South where heat and humidity are constant, solvent-based adhesive performs better.
Read the adhesive instructions carefully, noting application temperature range, curing time, coverage rate, and shelf life.
Most turf adhesive works best between 50°F and 85°F; cold or humid conditions slow curing and weaken the bond, so plan for a dry, moderate day.
Applying adhesive in a zig-zag bead pattern
Precision here creates an invisible, durable seam.
Position the seam tape under the lifted edge, centered on the backing and running the full repair length.
Apply adhesive in a zig-zag pattern along the tape’s center with steady, consistent pressure.
A thin bead doesn’t create enough bond.
Work in 3-4 foot sections. Apply adhesive, then press the turf down immediately. Don’t wait. Fresh adhesive bonds better than partially cured adhesive.
Aligning turf edges and securing the seam
Lower the turf edge onto the seam tape slowly. Use both hands to guide the fibers and backing into position.
Use your seam roller to apply firm, even pressure along the entire seam.
Roll the seam at least three times. The adhesive needs pressure to cure properly. A seam that’s simply pressed by hand without rolling often fails.
Check alignment as you roll. The turf edges should meet seamlessly with no gap or ridge.
Allow the adhesive to cure fully before testing. Most products require 24 hours.
How to Hide Seams in Artificial Grass for an Invisible Finish
A visible seam looks unfinished and affects ball roll on a putting green. The difference between a good repair and a great one is whether the seam disappears into the turf.
Blending seams with turf fibers and infill
Once the adhesive has cured, the seam should be nearly invisible if you applied it correctly.
Brush the seam area against the grain first. This lifts the fibers and makes them stand up naturally.
Use a stiff brush, not a soft one. The bristles need to move the fibers without damaging them.
Infill material also hides seams.
Redistributing infill and smoothing the surface
Spread infill material evenly over the seam repair. Use a broom to push the infill into the turf.
The infill should be level with the surrounding turf. High spots create ridges that affect ball roll. Low spots collect water and look unfinished.
Brush the entire repair area one more time after infill is in place.
Artificial Putting Green Repair: Quality Checks and Ball-Roll Testing
A seam repair isn’t complete until you verify it performs. Poor quality checks lead to repairs that fail within weeks.
Verifying surface smoothness and seam strength
Run your hand across the seam in all directions. You should feel no ridge, gap, or soft spot.
If you feel a ridge, the seam tape was too thick or the adhesive wasn’t applied evenly.
Press firmly along the seam. The turf should not move or flex.
Check the seam edges. Turf fibers should not be pulling away from the backing.
Testing ball roll and drainage after repair
Place a golf ball on the green about 3 feet from the seam. Roll it slowly toward the seam and watch how it behaves. A good seam should not affect the ball’s roll or cause it to deflect.
If the ball slows down, speeds up, or changes direction at the seam, the surface is not level.
Roll balls from multiple angles across the seam. Test from different distances.
Check drainage by pouring water on the seam. Water should drain through the infill and base layer without pooling.
Allow water to drain for 30 minutes. The surface should be dry and firm.
Common Mistakes to Avoid During Seam Repair
Most seam repairs fail because of preventable mistakes.
Rushing the curing process. Using the green before adhesive fully cures breaks the bond immediately.
Using the wrong adhesive type. Water-based adhesive fails in heat and humidity.
Not rolling the seam firmly enough. Light pressure creates weak bonds.
Applying too much adhesive. Excess adhesive squeezes out and creates a ridge.
When to Call a Professional for Putting Green Seam Repair
Some seam damage requires professional repair.
Call a professional if:
- The base layer is soft, degraded, or shows signs of poor drainage
- Multiple seams have failed or the entire green is failing
- The turf backing is torn or punctured beyond the seam area
- You’ve attempted repair and the seam failed again within weeks
- The putting green is part of a high-value installation where mistakes are costly
best practices for synthetic grass installation from industry standards outline professional-grade seam repair techniques that ensure durability.
At Southern Artificial Turf, we repair seams in putting greens that require precision and expertise.
synthetic grass for putting greens benefits and durability explains why professional installation and repair protect your long-term investment.
Seam repair keeps your artificial putting green playing true for years. But if you’re unsure about the base layer, have multiple failing seams, or want professional verification that your repair will last, get in touch with Southern Artificial Turf. We’ll assess your green and recommend the best path forward. Learn more about synthetic grass for putting greens to understand how proper installation and maintenance prevent seam failures. After repair, follow our comprehensive maintenance guide to keep your putting green in top condition.
Frequently Asked Questions
What causes seams in artificial putting greens to rupture or lift?
Seam failure typically results from inadequate base preparation, heavy foot traffic, temperature fluctuations, or UV exposure weakening the turf backing. For putting greens specifically, repeated ball impacts and the stress of maintaining a smooth playing surface can accelerate adhesive breakdown. Poor drainage underneath the turf can also trap moisture, causing the backing to deteriorate and seam tape to lose its grip over time.
What adhesive should you use to repair an artificial turf seam?
Use a polyurethane-based turf adhesive specifically formulated for artificial grass seam repair. These adhesives cure in humid conditions and maintain flexibility as temperatures change. Verify compatibility with your turf’s polyethylene backing before applying. Always follow the manufacturer’s curing time, typically 24 to 48 hours, before allowing foot traffic on the repaired seam. Avoid general-purpose construction adhesives, which may not bond properly to turf backing.
How do you keep an artificial grass seam from lifting after repair?
After applying adhesive and aligning the turf edges, press the seam firmly for at least 30 seconds to ensure full contact. Use a seaming roller or hand roller to compress the seam along its entire length. Avoid walking on the repaired area until the adhesive has fully cured. For putting greens, redistribute infill material over the seam to add weight and stability. Proper base drainage also prevents moisture from weakening the adhesive bond.
When should a damaged putting green seam be professionally repaired?
Consider professional repair if the seam rupture is longer than 12 inches, if the turf backing is punctured or torn, if the base layer is damaged, or if the seam has lifted multiple times. Putting greens require precise surface smoothness for accurate ball roll; professionals have specialized tools to verify this after repair. If drainage has been compromised or the damage extends beneath the turf surface, a professional assessment ensures the underlying structure is restored correctly.